> ## Documentation Index
> Fetch the complete documentation index at: https://docs.chatzy.ai/llms.txt
> Use this file to discover all available pages before exploring further.
# How to setup WhatsApp calling for AI Agents
This guide explains how to enable and set up WhatsApp calling to assign a Voice AI Agent to answer incoming calls or make outgoing calls via Chatzy AI.
***
### Requirements
* **Connected WhatsApp Number:** You must have a WhatsApp number connected in the [Channels](https://app.chatzy.ai/channels/whatsapp) section.
* [**Voice AI Agent:**](https://app.chatzy.ai/voice-ai-agents) You must have a configured Voice AI Agent.
***
## Enable WhatsApp Calling
1. Navigate to **Channels** in the left-hand menu.
2. Click on **WhatsApp**. Your connected WhatsApp numbers will appear here.
3. Click the **Three Dots** icon under the **Actions** column and select **Enable WhatsApp Calling**.
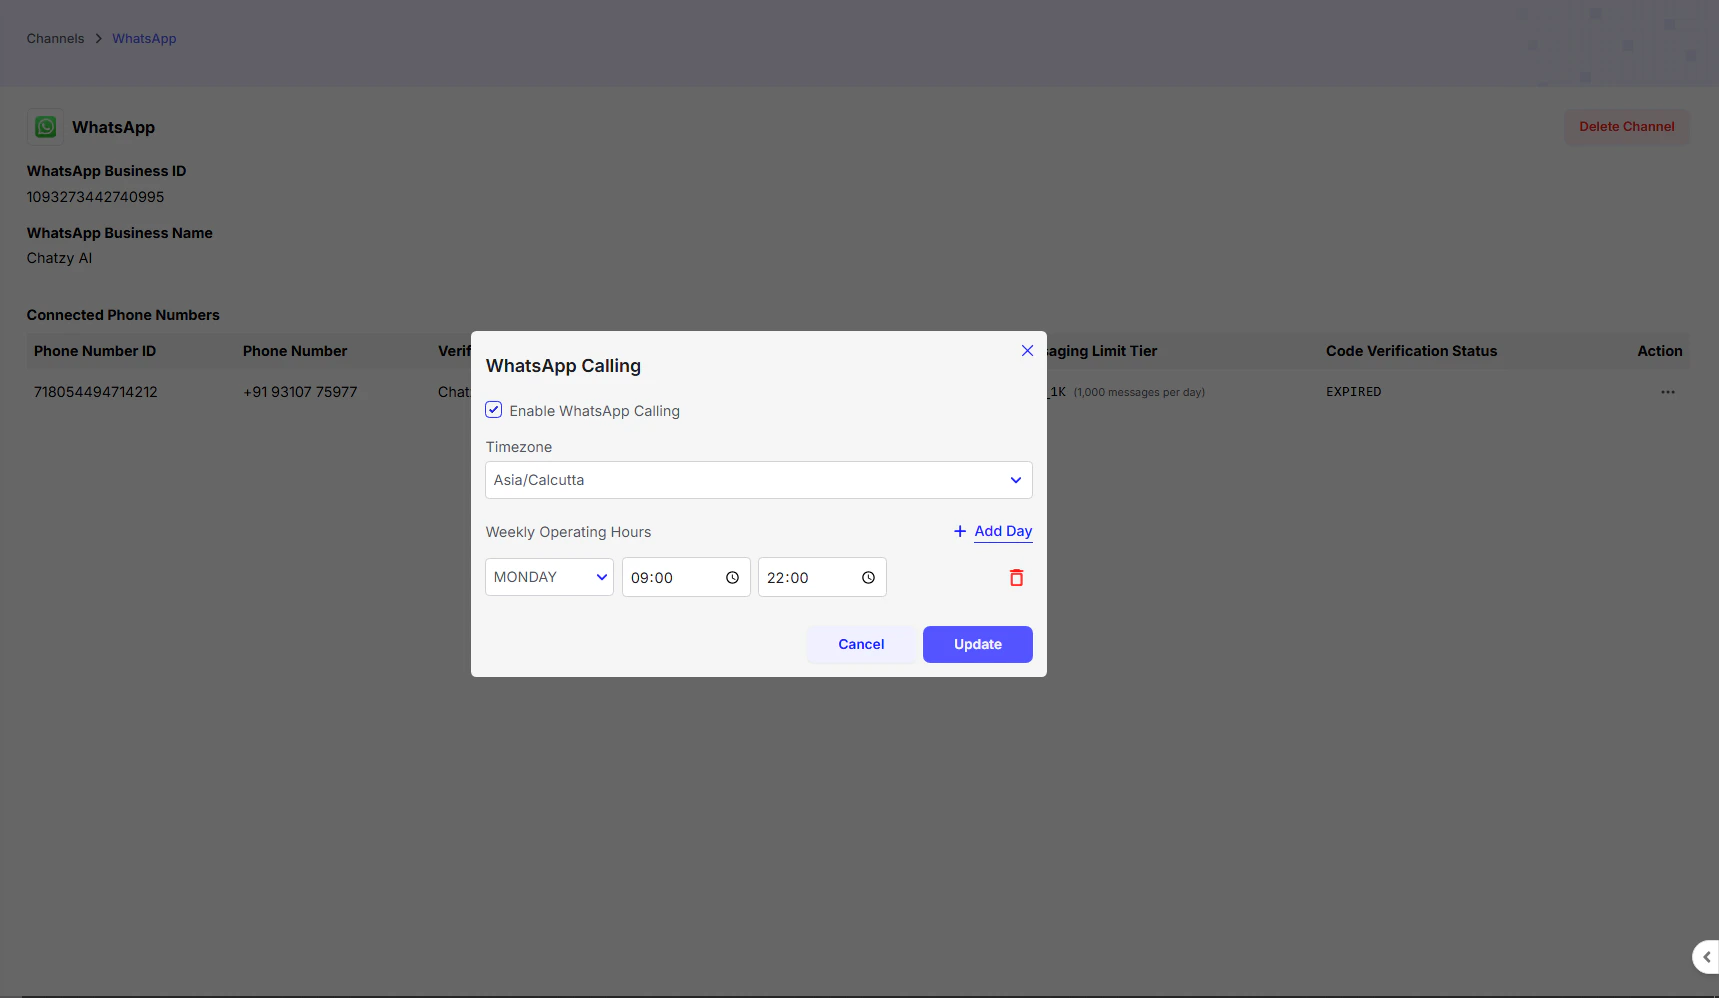 4. Check the box labeled **Enable WhatsApp calling**.
5. Configure your weekly working hours and select the correct **Time Zone**.
6. Click **Save** or **Update**.
***
# Call Handling Setup
### Set Up Voice AI Agent for Incoming Calls
1. Go to the **Journeys** section.
2. Click **Create Journey**, give it a name, choose **Blank Template**, and click **Create**.
3. Click **Add Trigger** → select **Incoming Call**.
4. Check the box labeled **Enable WhatsApp calling**.
5. Configure your weekly working hours and select the correct **Time Zone**.
6. Click **Save** or **Update**.
***
# Call Handling Setup
### Set Up Voice AI Agent for Incoming Calls
1. Go to the **Journeys** section.
2. Click **Create Journey**, give it a name, choose **Blank Template**, and click **Create**.
3. Click **Add Trigger** → select **Incoming Call**.
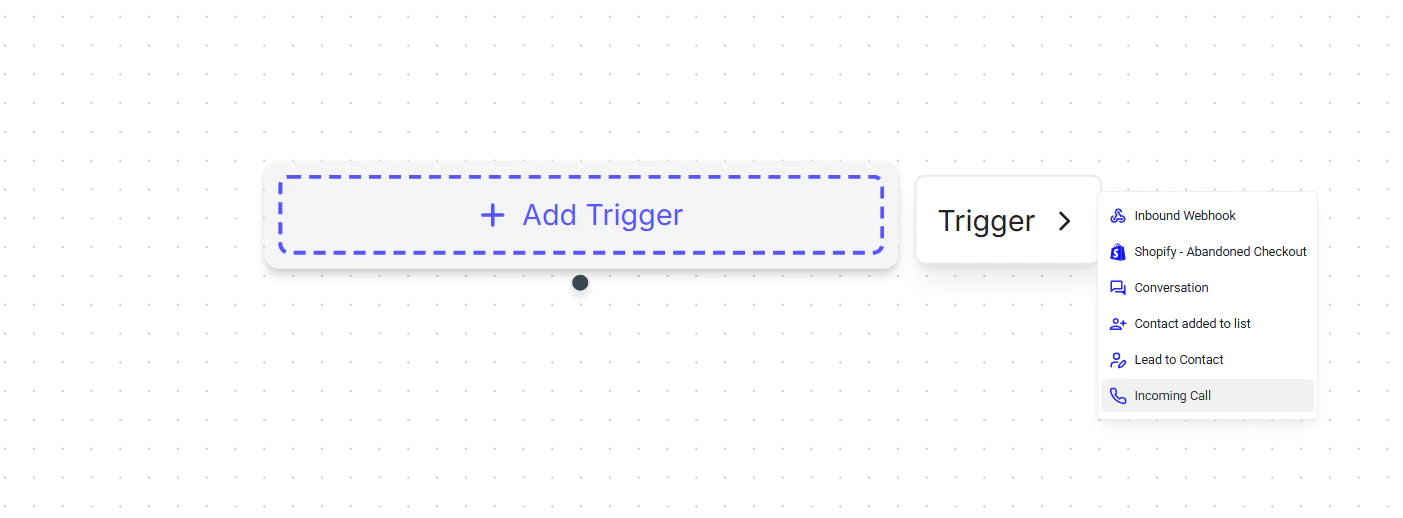 4. Add an action → select **Assign to Voice AI Agent**.
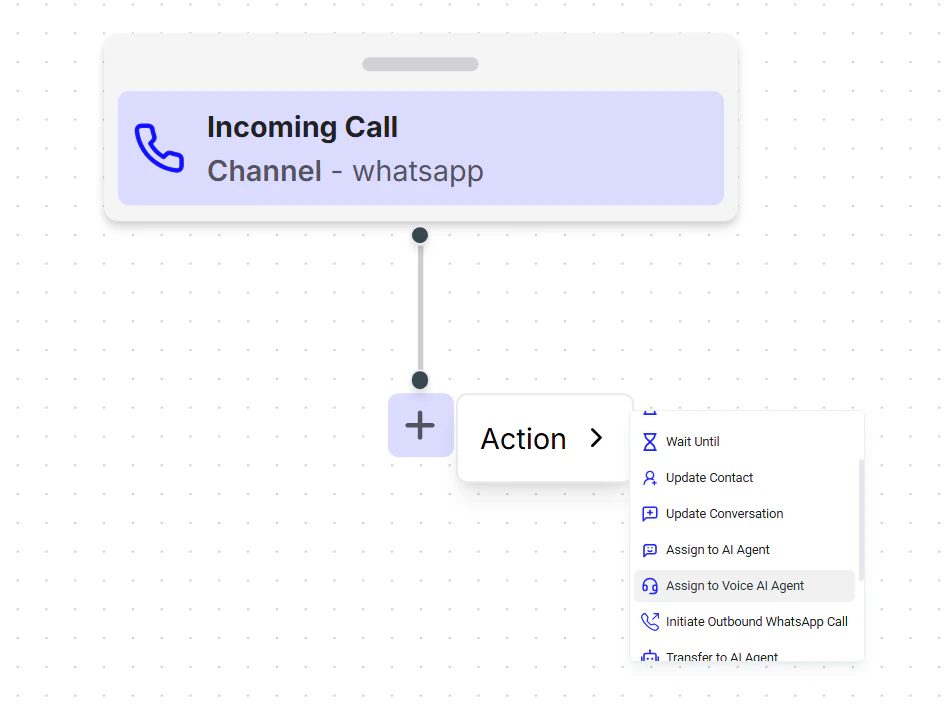 5. Open the settings of the action. Select the **Voice AI Agent** from the dropdown.
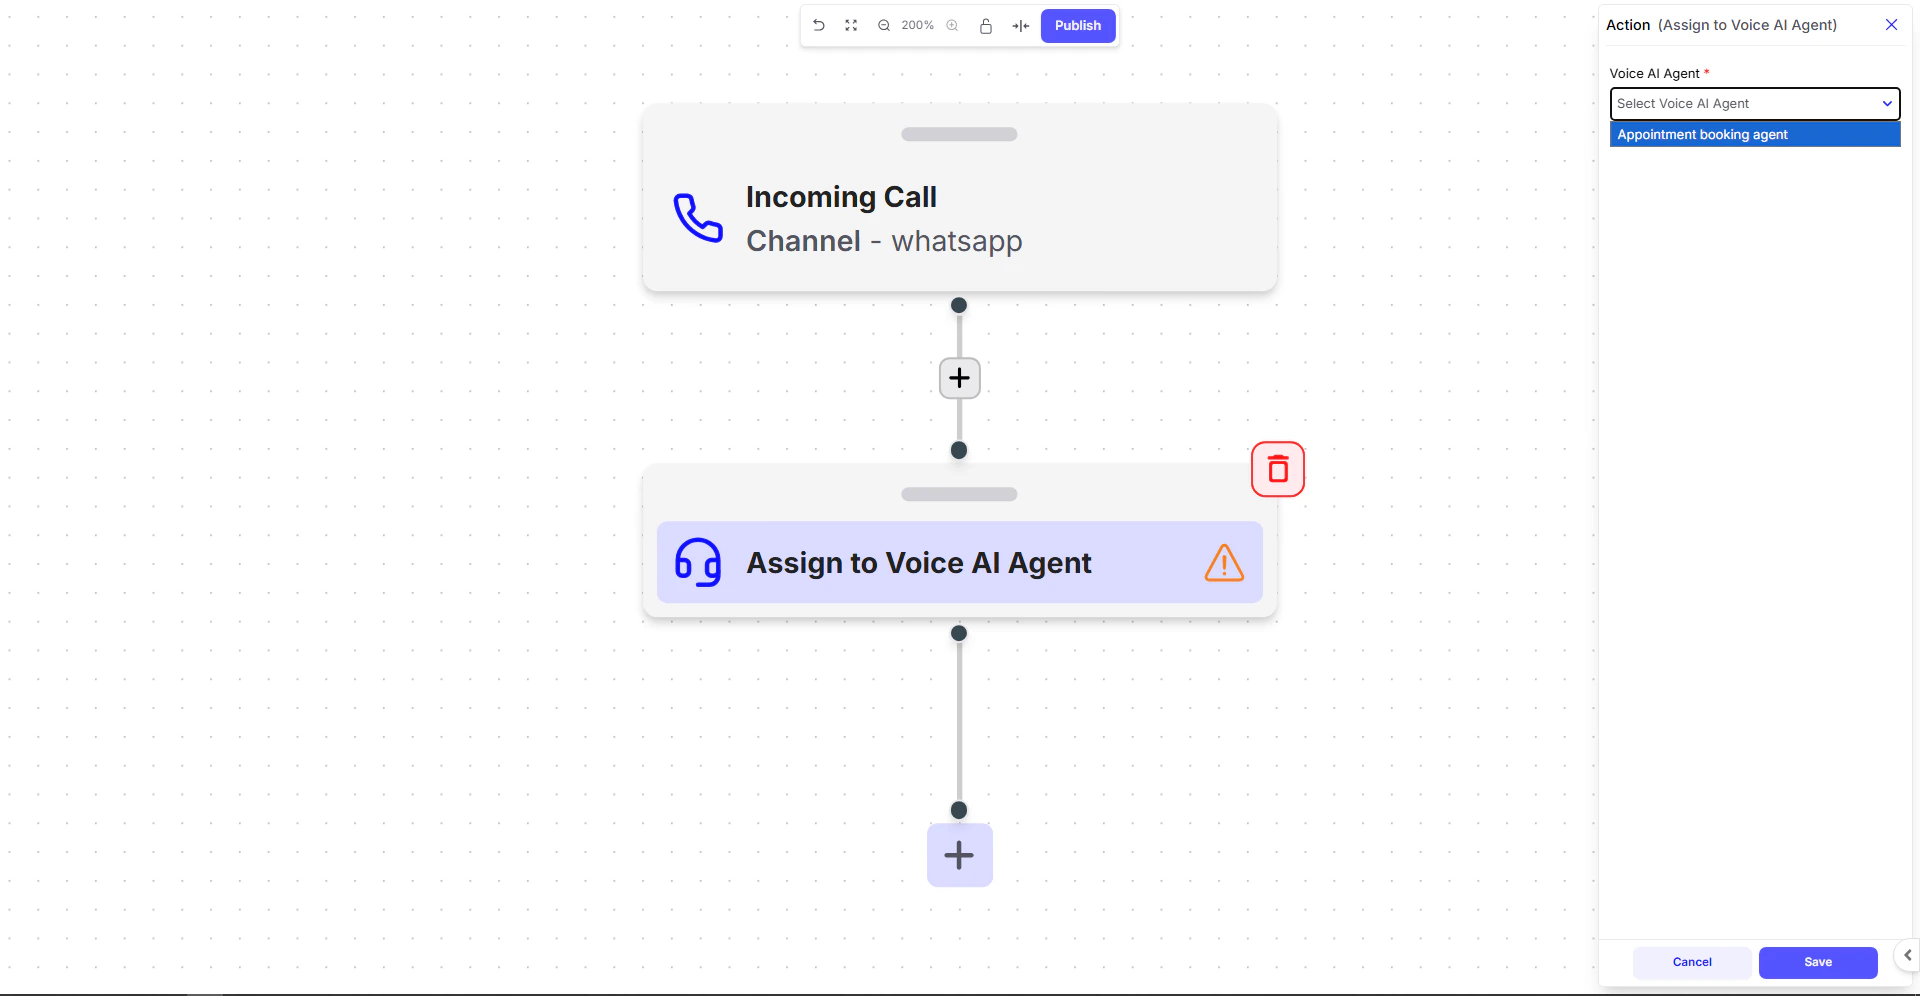 6. Click **Save**, then **Publish** to activate the journey.
### Step 1: Create a WhatsApp Call Permission Template
For business-initiated WhatsApp calls, you must first get the user's permission.
1. Go to **Message Templates** → select **WhatsApp**.
2. Click **+ Create Template**.
3. Set **Category: Marketing**, give it a name, and choose the **Language**.
4. Write your permission message inside the **Body** field.
5. Enable the **Call permission request** toggle.
6. Click **Save**, then **Publish** to activate the journey.
### Step 1: Create a WhatsApp Call Permission Template
For business-initiated WhatsApp calls, you must first get the user's permission.
1. Go to **Message Templates** → select **WhatsApp**.
2. Click **+ Create Template**.
3. Set **Category: Marketing**, give it a name, and choose the **Language**.
4. Write your permission message inside the **Body** field.
5. Enable the **Call permission request** toggle.
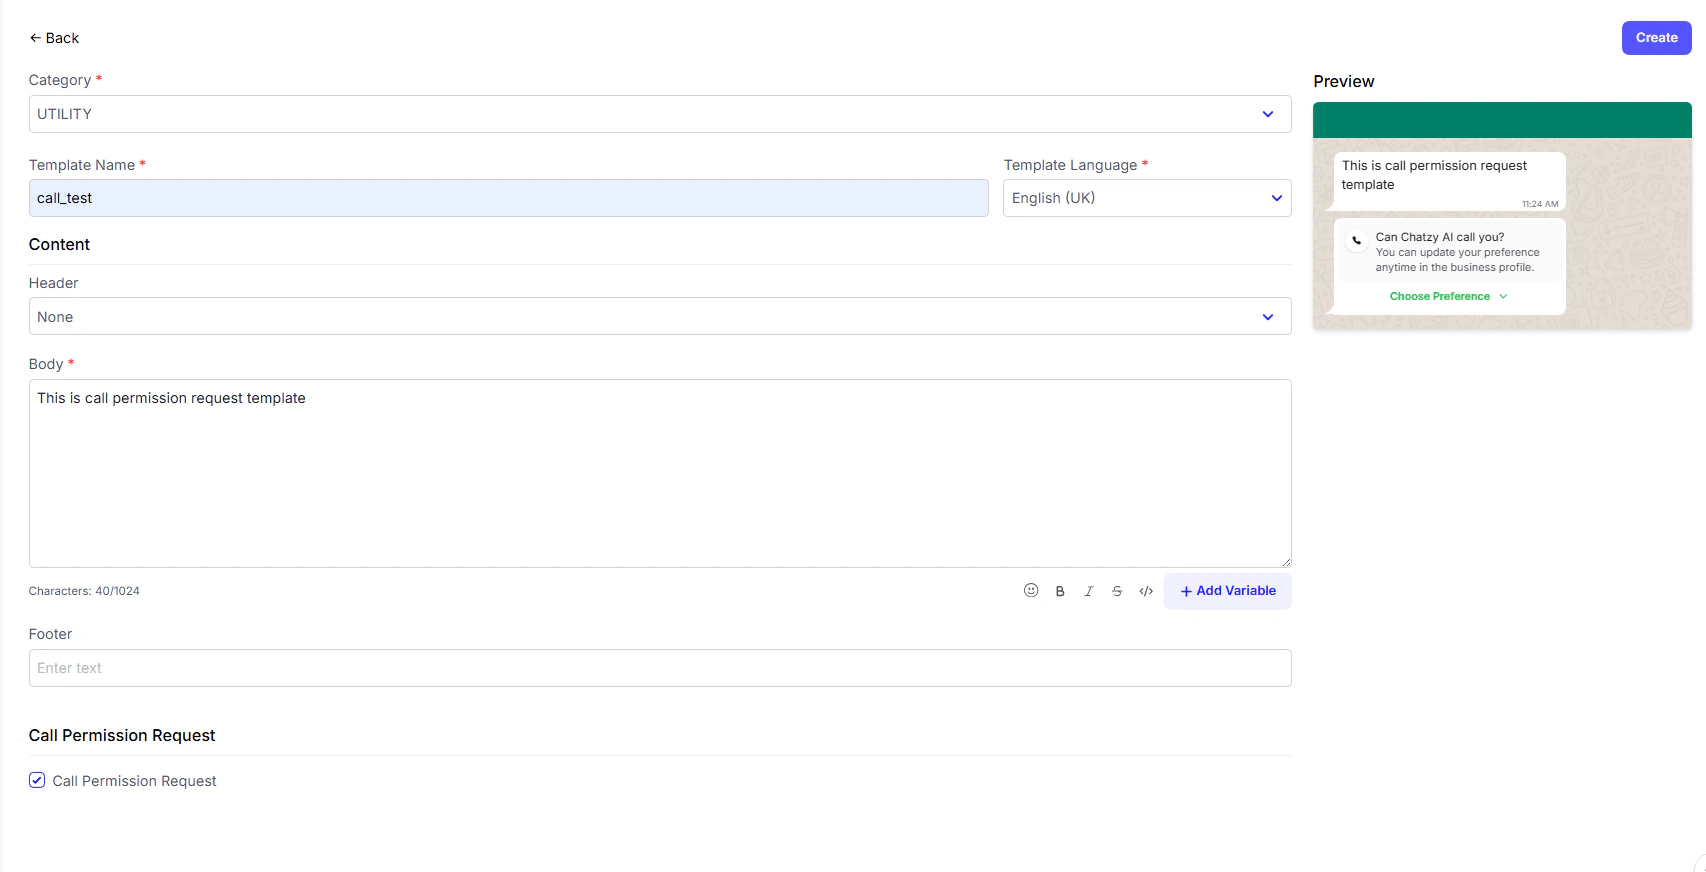 6. Review the preview and click **Create**.
> WhatsApp may take up to 24 hours to approve the template.
***
### Step 2: Set Up Outbound WhatsApp Calls in Journeys
1. Go to **Journeys** and open the journey where you want to trigger the call.
2. Go to the step after which the call should be initiated (e.g., after an `Execute Code` action, `Wait` action, etc.).
3. Add a new action: **Initiate Outbound WhatsApp Call**.
4. Set the correct **Phone Number**, depending on the trigger:
* Inbound Webhook trigger:\
`{{inbound_webhook.phone_number}}`
* Conversation trigger:\
`{{contact.phone_number}}`
5. Select the **Voice AI Agent** that should make the call.
6. Review the preview and click **Create**.
> WhatsApp may take up to 24 hours to approve the template.
***
### Step 2: Set Up Outbound WhatsApp Calls in Journeys
1. Go to **Journeys** and open the journey where you want to trigger the call.
2. Go to the step after which the call should be initiated (e.g., after an `Execute Code` action, `Wait` action, etc.).
3. Add a new action: **Initiate Outbound WhatsApp Call**.
4. Set the correct **Phone Number**, depending on the trigger:
* Inbound Webhook trigger:\
`{{inbound_webhook.phone_number}}`
* Conversation trigger:\
`{{contact.phone_number}}`
5. Select the **Voice AI Agent** that should make the call.
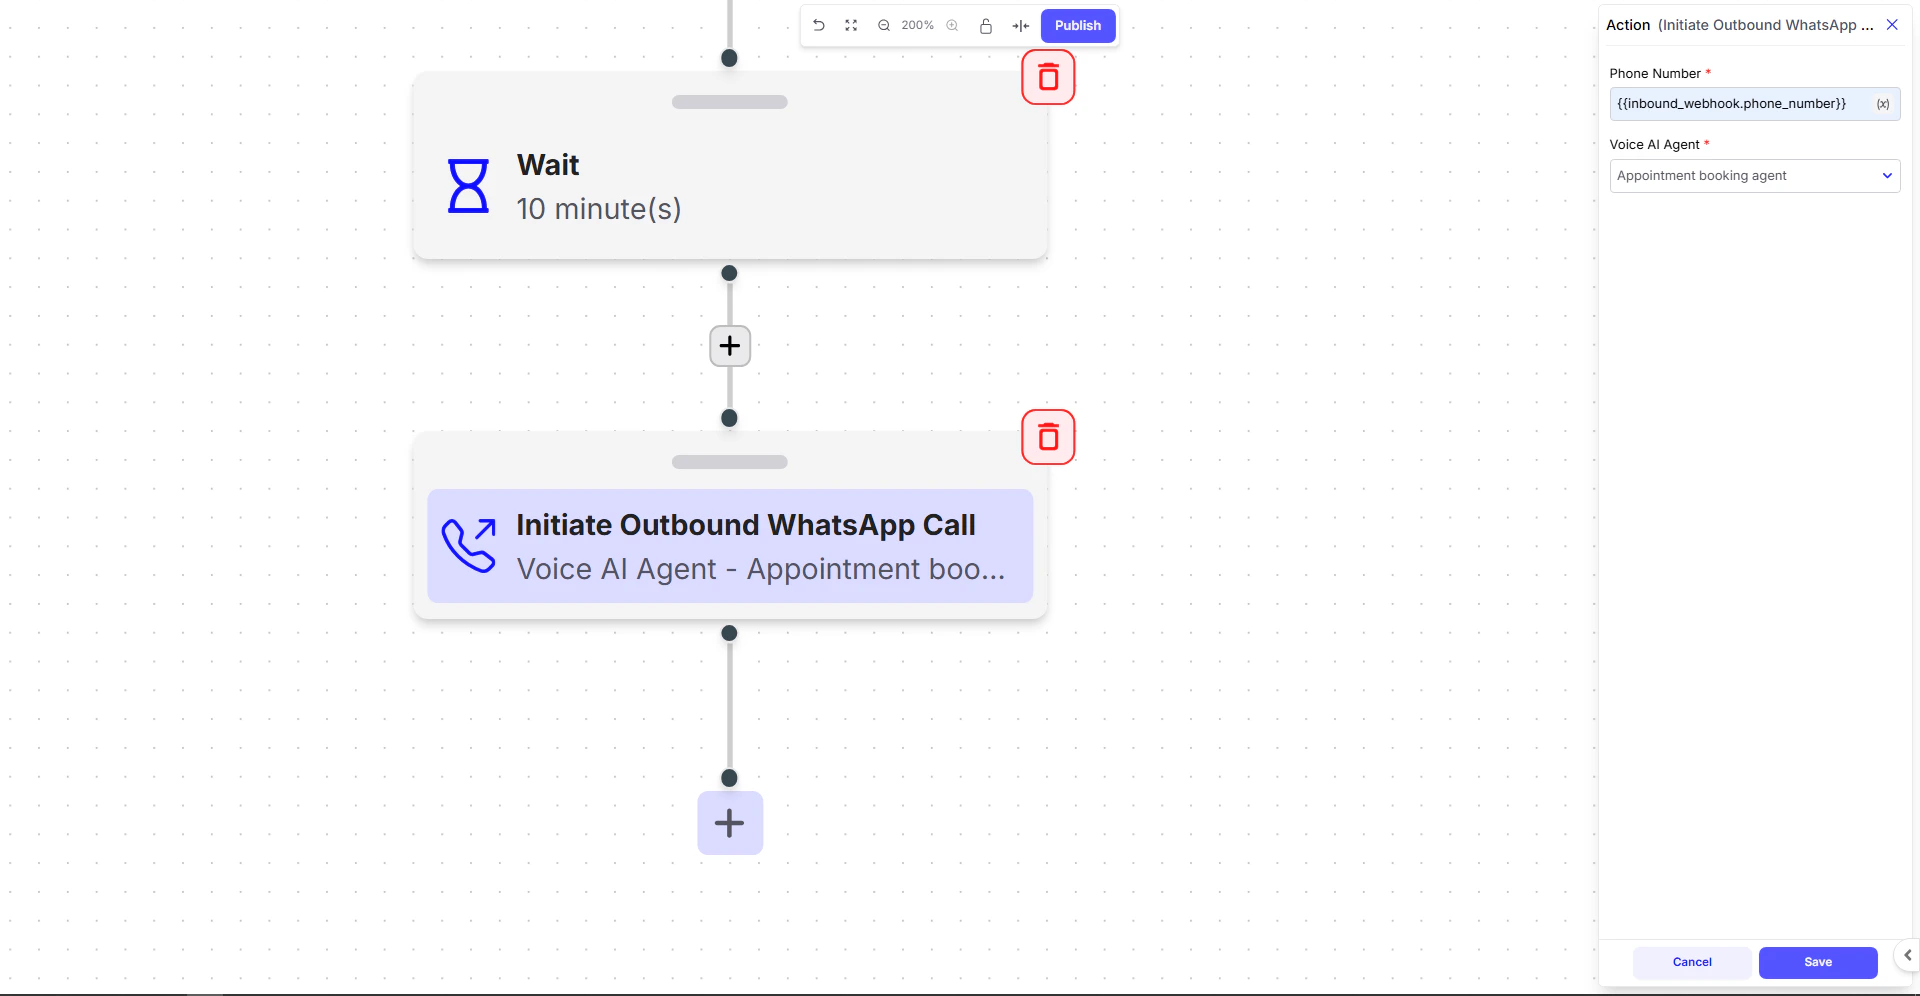 6. Click **Save**, then **Publish**.
***
[Learn more](https://docs.chatzy.ai/ai-agents/conversational-ai-agent/additional-concepts#advance-settings-for-conversational-ai-agent) about how call buttons work inside a Conversational AI Agent.
6. Click **Save**, then **Publish**.
***
[Learn more](https://docs.chatzy.ai/ai-agents/conversational-ai-agent/additional-concepts#advance-settings-for-conversational-ai-agent) about how call buttons work inside a Conversational AI Agent.