> ## Documentation Index
> Fetch the complete documentation index at: https://docs.chatzy.ai/llms.txt
> Use this file to discover all available pages before exploring further.
# WhatsApp Templates
 ## How to Create WhatsApp Template Messages in Chatzy AI
Hey there! Welcome to this guide, where you will learn how to create WhatsApp template messages in **Chatzy AI**.
Before moving forward, make sure you have connected your **WhatsApp number** to Chatzy AI and it is visible under **Channels → WhatsApp**.
If not, please check the previous tutorial video before proceeding.
***
### Step 1: Navigate to Message Templates
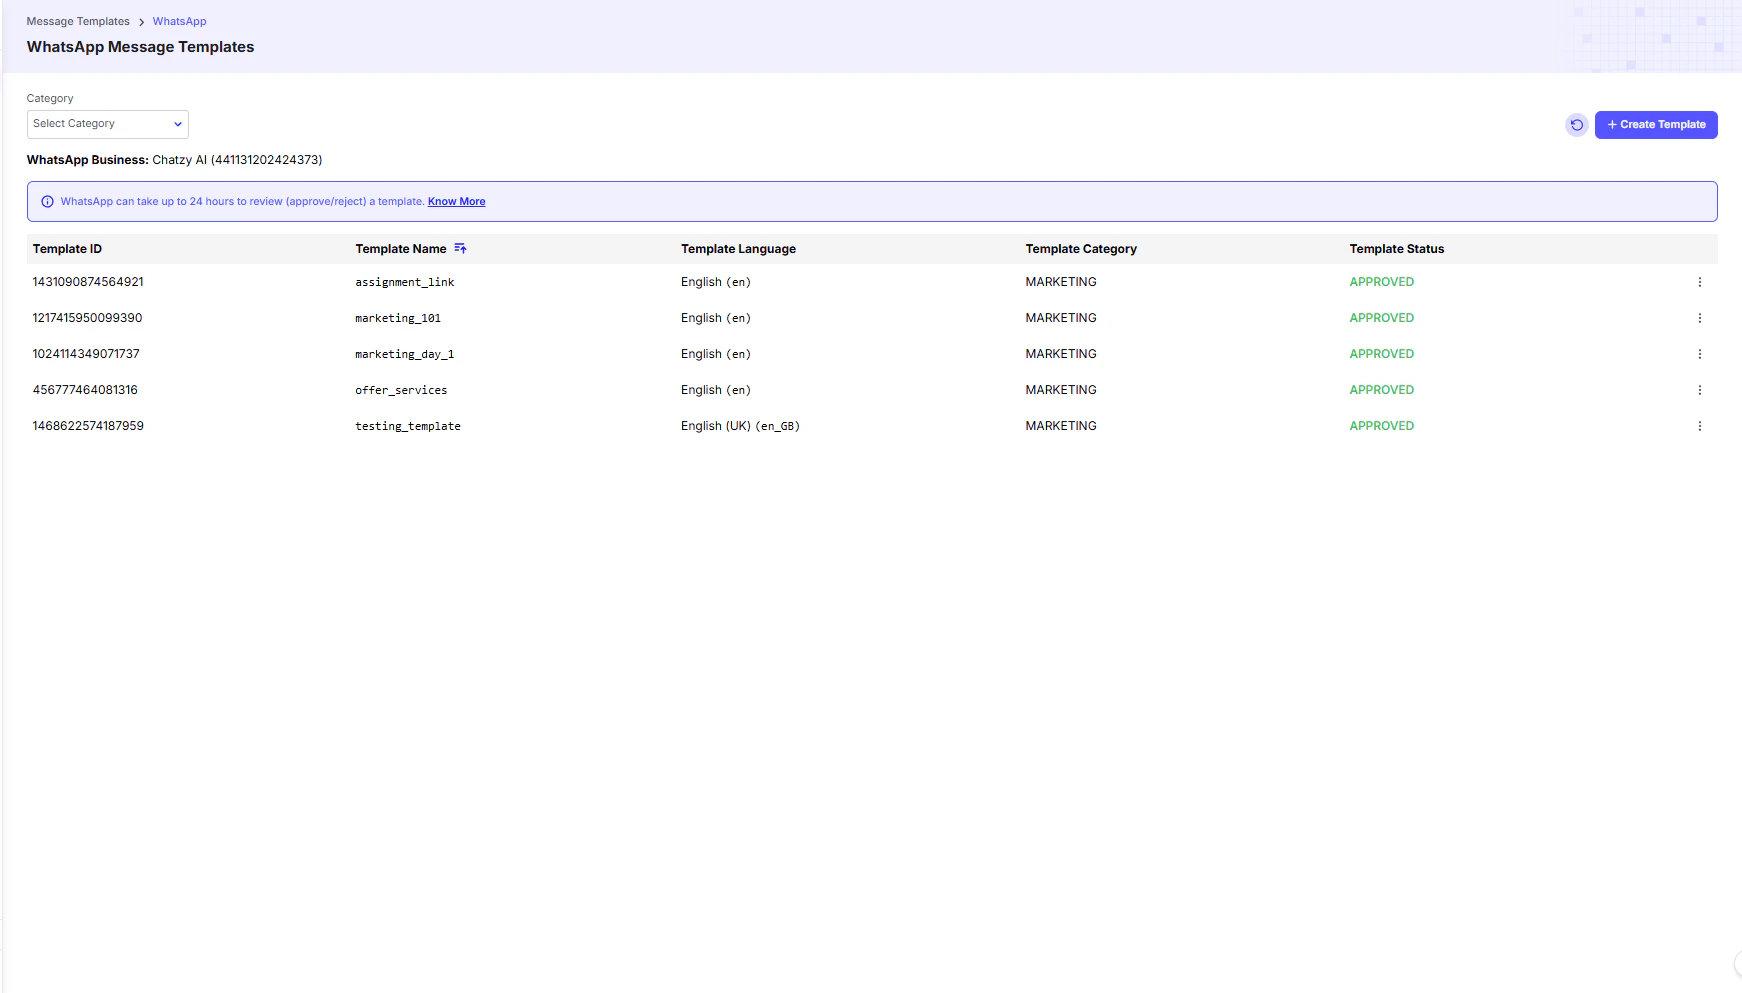
* Go to the **Message Templates** section of Chatzy AI.
* Select the **WhatsApp** channel to view your existing templates and their approval status.
* If you haven’t created any templates yet, this page will be empty.
* Click on the **`+ Create Template`** button to start creating a new template.
***
### Step 2: Select the Right Category
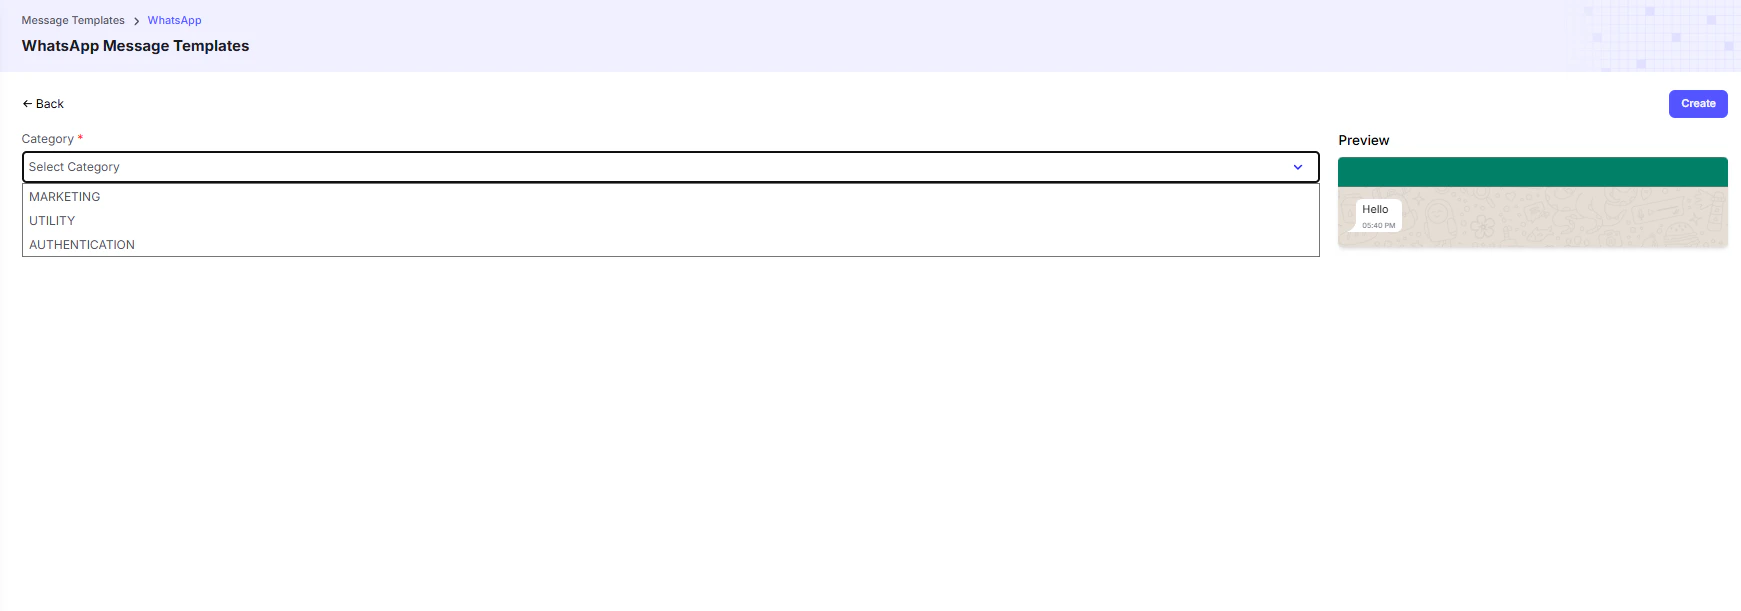
WhatsApp requires you to choose a **category** for each template. This defines its purpose:
| Category | Purpose |
| ------------------ | ----------------------------------------------------------------------- |
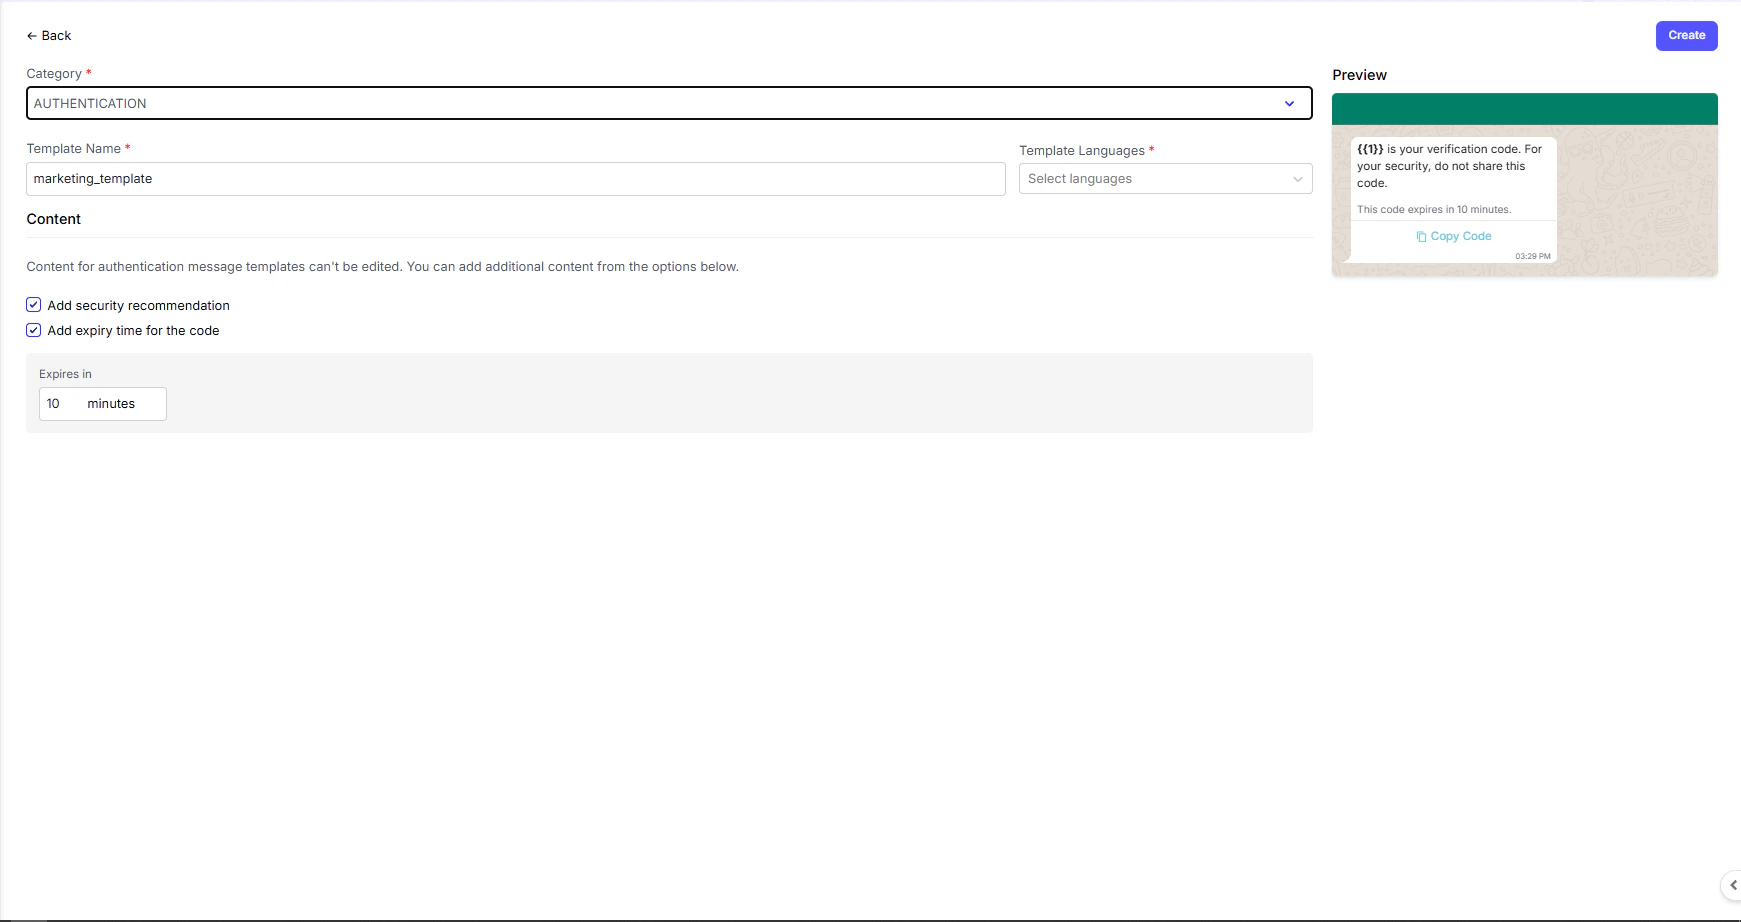
| **Authentication** | One-time passwords (OTPs), login verification. |
| **Utility** | Transactional updates: order confirmations, account updates, reminders. |
| **Marketing** | Promotional content, sales announcements, brand awareness. |
> 💡 **Tip:** Choosing the correct category is essential. Selecting the wrong one may lead to rejection by Meta.\
> Marketing templates usually cost more to send. For pricing details, visit the **Pricing** page on Chatzy AI.
## How to Create WhatsApp Template Messages in Chatzy AI
Hey there! Welcome to this guide, where you will learn how to create WhatsApp template messages in **Chatzy AI**.
Before moving forward, make sure you have connected your **WhatsApp number** to Chatzy AI and it is visible under **Channels → WhatsApp**.
If not, please check the previous tutorial video before proceeding.
***
### Step 1: Navigate to Message Templates
* Go to the **Message Templates** section of Chatzy AI.
* Select the **WhatsApp** channel to view your existing templates and their approval status.
* If you haven’t created any templates yet, this page will be empty.
* Click on the **`+ Create Template`** button to start creating a new template.
***
### Step 2: Select the Right Category
WhatsApp requires you to choose a **category** for each template. This defines its purpose:
| Category | Purpose |
| ------------------ | ----------------------------------------------------------------------- |
| **Authentication** | One-time passwords (OTPs), login verification. |
| **Utility** | Transactional updates: order confirmations, account updates, reminders. |
| **Marketing** | Promotional content, sales announcements, brand awareness. |
> 💡 **Tip:** Choosing the correct category is essential. Selecting the wrong one may lead to rejection by Meta.\
> Marketing templates usually cost more to send. For pricing details, visit the **Pricing** page on Chatzy AI.
 ***
### Step 3: Add Basic Information
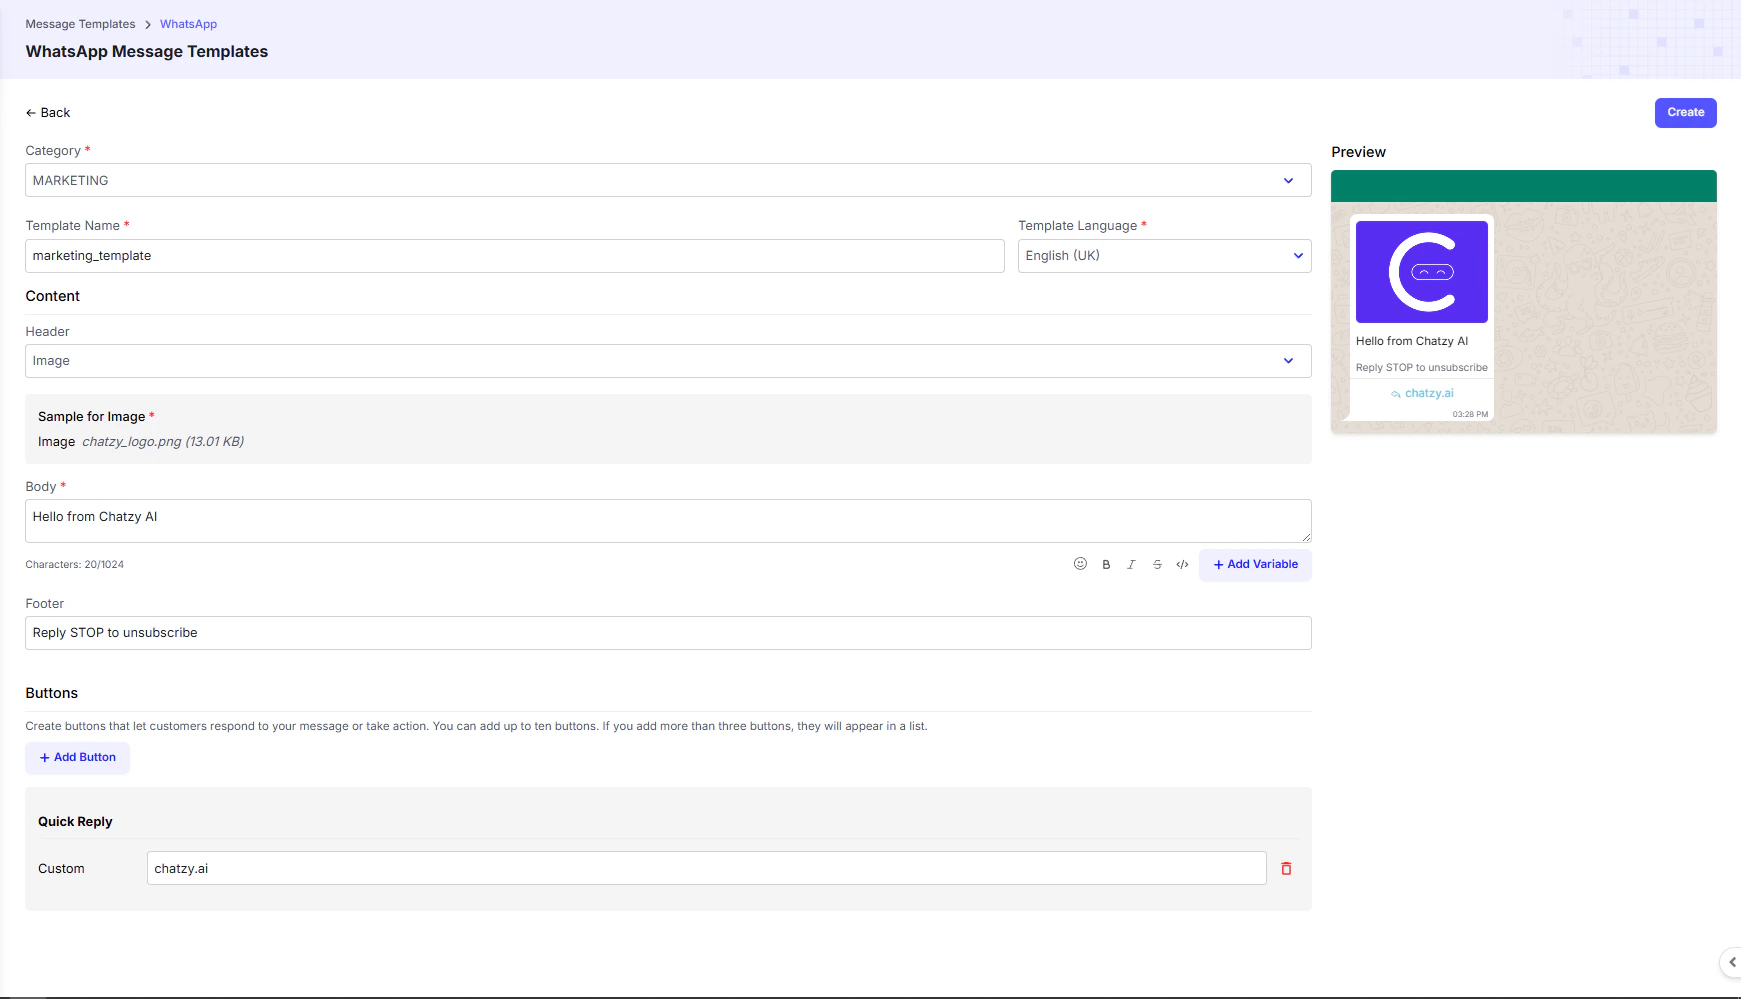
* **Template Name** → Pick a unique and easy-to-identify name.
* **Language** → Choose the language of your message.
* Decide if the template will contain **text only** or **media**.
If adding **media** (image, video, or document):
* Select the media type in the **Header** dropdown and upload your file.
* The uploaded media is only for preview. You will need to upload it again while sending campaigns.
You can also add **text in the header**. Header text appears in **bold** at the top.
***
### Step 4: Write the Message
* **Body** → This is the main message content. Supports emojis, **bold**, and *italic* text.
* Keep it **short and engaging** for better delivery rates.
* **Footer** *(optional)* → Use it for greetings or less prominent info.
***
### Step 5: Add Interactivity with Buttons
Buttons make your template **interactive**:
| Button Type | Action |
| ------------------------ | -------------------------------------------------------------- |
| **Quick Reply** | Lets users reply with predefined options directly in WhatsApp. |
| **Call to Action (CTA)** | Takes users to a webpage or initiates a phone call. |
***
### Step 3: Add Basic Information
* **Template Name** → Pick a unique and easy-to-identify name.
* **Language** → Choose the language of your message.
* Decide if the template will contain **text only** or **media**.
If adding **media** (image, video, or document):
* Select the media type in the **Header** dropdown and upload your file.
* The uploaded media is only for preview. You will need to upload it again while sending campaigns.
You can also add **text in the header**. Header text appears in **bold** at the top.
***
### Step 4: Write the Message
* **Body** → This is the main message content. Supports emojis, **bold**, and *italic* text.
* Keep it **short and engaging** for better delivery rates.
* **Footer** *(optional)* → Use it for greetings or less prominent info.
***
### Step 5: Add Interactivity with Buttons
Buttons make your template **interactive**:
| Button Type | Action |
| ------------------------ | -------------------------------------------------------------- |
| **Quick Reply** | Lets users reply with predefined options directly in WhatsApp. |
| **Call to Action (CTA)** | Takes users to a webpage or initiates a phone call. |
 ***
### Step 6: Use Variables for Personalization
Variables let you insert dynamic, user-specific details like **names, order numbers, or dates**.
* Add variables in the **Header** (Text type) or **Body** using **double curly brackets**.
* Example: `{{1}}`, `{{2}}` for multiple placeholders.
* Add **sample values** for each variable to help Meta understand and approve your template faster.
> ⚠️ These sample values are for demonstration only. You must provide real values when sending campaigns.
***
### Step 7: Review & Submit
Once everything looks good in the preview:
* Click **Create** to submit your template.
* Meta usually approves templates within a few seconds, but it may take up to **24 hours**.
* Refresh the page to check the template’s status.
***
### Step 6: Use Variables for Personalization
Variables let you insert dynamic, user-specific details like **names, order numbers, or dates**.
* Add variables in the **Header** (Text type) or **Body** using **double curly brackets**.
* Example: `{{1}}`, `{{2}}` for multiple placeholders.
* Add **sample values** for each variable to help Meta understand and approve your template faster.
> ⚠️ These sample values are for demonstration only. You must provide real values when sending campaigns.
***
### Step 7: Review & Submit
Once everything looks good in the preview:
* Click **Create** to submit your template.
* Meta usually approves templates within a few seconds, but it may take up to **24 hours**.
* Refresh the page to check the template’s status.
 ***
## ✅ Final Tips
* Follow WhatsApp’s **template guidelines** strictly.
* Submitting **promotional language** under **Utility** or **Authentication** categories may cause **rejection**.
Creating engaging and effective WhatsApp template messages in **Chatzy AI** is that simple.\
Get started today to enhance your customer communication effortlessly!
***
## ✅ Final Tips
* Follow WhatsApp’s **template guidelines** strictly.
* Submitting **promotional language** under **Utility** or **Authentication** categories may cause **rejection**.
Creating engaging and effective WhatsApp template messages in **Chatzy AI** is that simple.\
Get started today to enhance your customer communication effortlessly!